How to Make a Traditional Herb Drying Rack: A Simple Step-by-Step Guide
A brief history and why it still matters
Drying herbs is one of the oldest preservation techniques. Long before refrigeration, families in small towns and farmsteads hung bunches of thyme, sage and bay from beams so they would last through winter. The practice conserved flavour, scent and practical usefulness for cooking, teas and household remedies. Today, a small herb drying rack is as much about connecting to that tradition as it is about making efficient use of space and keeping summer scents for cooler months.
Materials and basic considerations
Choose breathable materials and a warm, dry spot with good air circulation and out of direct sunlight. You need only a few simple items:
- Thin wooden dowels, a narrow ladder, or a small frame (about 3–5 rods, depending on size)
- Twine or cotton string
- Clothespins or small clips (optional)
- Hooks or a place to hang the rack (ceiling beam, shelf edge, or wall hook)
- Scissors and a pruning shear or sharp knife
Step-by-step method
- Harvest at the right time. Pick herbs in the morning after the dew has dried but before the day heats up. This preserves essential oils in leaves and flowers. Focus on healthy, undamaged stems.
- Prepare small bunches. Gather 6–12 stems into a single bunch, aligning the cut ends. Keep bunches small so air can circulate between leaves. Use herbs of similar thickness in one bunch to ensure even drying.
- Secure with twine. Tie each bunch tightly with twine about 1–2 cm above the cut ends. A tight knot prevents leaves from slipping and makes hanging easier.
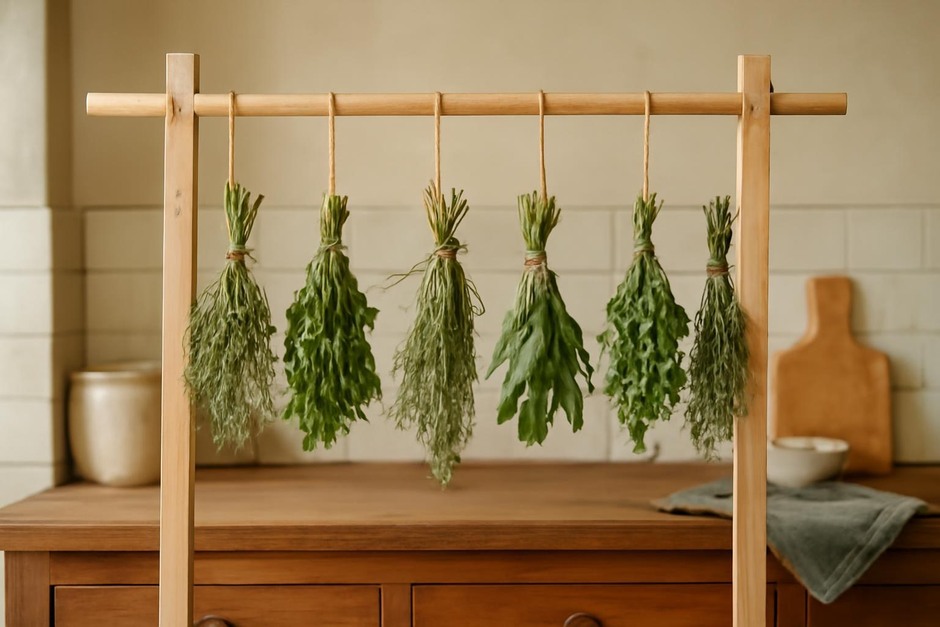
- Assemble the rack. If using dowels, space them 8–12 cm apart in a frame or suspend them horizontally with string between two hooks. A simple ladder laid on its side also works: hang bunches from the rungs. Ensure there is 5–10 cm clearance between bunches vertically.
- Hang the herbs. Suspend the tied bunches upside down from the rack so air flows around them. If you prefer, use clothespins to clip them to the dowel. Keep the rack in a dark, ventilated spot—light can bleach oils and colour.
- Allow to dry fully. Drying time varies by plant and conditions. Most herbs take 1–3 weeks. They are ready when leaves crumble easily between fingers and stems snap rather than bend.
- Store properly. Remove leaves from stems and store in airtight jars away from light and heat. Label jars with the date for best quality tracking.
Variations
- Window-frame rack: Repurpose an old window by stretching twine across the frame in parallel rows. Hang herbs from the twine or clip them with clothespins for a decorative, rustic look.
- Foldable kitchen rack: For small kitchens, use a collapsible wooden hanger or a broom handle supported between two hooks. This saves space when not in use.
- Paper-bag method: Place bunches inside a paper bag with the top open and small holes punched for airflow. This reduces dust and preserves colour for delicate flowers like lavender.
- Vertical hanging pole: Install a single pole across a pantry or under a shelf and hang bundles by twine. This concentrates drying in one compact area and works well for longer stems.
- Mixed herb ropes: Braid several stems together to create an ornamental rope of herbs. This is decorative and functional—just ensure the braid isn’t too tight to block airflow.
Troubleshooting
- Mold or musty smell: Cause: inadequate airflow or too-humid environment. Solution: move rack to a drier, more ventilated spot, separate bunches, and consider a dehumidifier or fan on low for a few hours daily.
- Leaves lose colour or aroma: Cause: too much direct sunlight or prolonged drying at high heat. Solution: relocate to a darker area and ensure moderate, steady temperatures; harvest earlier in the day next time.
- Stems bend instead of snapping: Cause: herbs are not fully dry. Solution: allow more time, check every few days, and break a small stem to test for brittleness before storing.
- Insects or debris: Cause: outdoor drying can invite insects. Solution: use the paper-bag method or an indoor rack; lightly shake bunches before tying to remove small insects.
- Herbs become woody or bitter: Cause: harvesting stems that are too old or overexposure to heat. Solution: harvest younger stems and shorten drying time by using thinner bunches or better airflow.
Making a traditional herb drying rack is a low-cost, low-effort way to capture summer flavours and continue a long domestic tradition. With a few simple adjustments and attention to airflow and light, you can preserve herbs that brighten meals and rooms throughout the year.